Spürt den Druck! Wie fühlt sich Wasser an?

Wenn man kleine Kinder fragt: „wie fühlt sich Wasser an?“, dann sagen sie vielleicht „nass“ oder „kalt“. Denn das ist die typische Empfindung. Das Wasser benetzt die Haut und kühlt sie dadurch ab. Aber es gibt noch eine andere Eigenschaft von Wasser, nämlich den Wasserdruck. Das Gewicht des Wassers erzeugt Druck und den kann man mit einem einfachen Trick spüren. Das Ergebnis ist sehr verblüffend. Das müsst ihr mal ausprobieren.
- Was ihr dazu braucht: hohe Schüssel oder Eimer mit Wasser, dünnen Folienbeutel (Frühstücksbeutel)
- Schwierigkeitsgrad: einfach und ungefährlich
- Altersempfehlung: ab vier Jahren

Hier geht's zum "Druck spüren" Videoexperiment:
So geht das "spürt den druck" experiment:.
Füllt eine hohe Schüssel oder einen Eimer mit Wasser. Wichtig ist, dass das Wasser so hoch steht, dass ihr eure ganze Hand eintauchen könnt.
Jetzt taucht mal mit der Hand ins Wasser. Wie fühlt sich das an? Zieht die Hand wieder aus dem Wasser und bewegt sie ganz langsam und dann etwas schneller in der Luft. Beschreibt eure Empfindung.

Trocknet die Hand wieder ab und streift euch einen dünnen Folienbeutel (Frühstücksbeutel) über die Hand. Spreizt die Finger ab und geht jetzt wieder ganz langsam mit der Hand ins Wasser. Passt auf, dass dabei das Wasser nicht in euren Folienhandschuh läuft. Wie fühlt sich das jetzt an?

Und noch ein Zusatzexperiment: formt eine Faust, steckt wieder den Folienbeutel über die Faust und geht wieder ins Wasser. Versucht jetzt mal unter Wasser die Faust wieder zu öffnen. Was passiert?

Was passiert bei diesem Experiment und warum ist das so?
Wenn ihr die Hand ins Wasser taucht, fühlt sich das Wasser vielleicht warm oder kalt an, je nachdem welche Temperatur es hat. Und es ist natürlich irgendwie nass. Das liegt daran, dass das Wasser die Haut benetzt. Es klebt sozusagen ein wenig auf der Haut und tropft langsam ab.
Wenn ihr die nasse Hand dann bewegt, fühlt es sich noch kälter an. Das liegt daran, dass durch den Luftzug der Bewegung das Wasser verdunstet und dabei der Hand Wärme entzieht. Die Hand kühlt sich dabei ab.
Wasser fühlt sich also irgendwie nass an und die nasse Hand fühlt sich kalt an, wenn es windig ist. Das kennt ihr vielleicht vom Schwimmbad, wenn ihr aus dem Wasser steigt. Dann friert ihr sehr schnell. Das nennt man auch Windchill-Effekt.
Ganz anders fühlt sich das Wasser an, wenn ihr den Folienbeutel über der Hand habt. Denn jetzt spürt ihr den Druck, den das Wasser macht. Das Wasser hat ein eigenes Gewicht. 1 l Wasser wiegt 1 kg. Mit dem Gewicht drückt das Wasser auf eure Hand. In diesem Experiment drückt das Wasser auf die Folie und genau das könnt ihr spüren. Die Finger sehen dabei aus wie die Würstchen in einer Vakuumsverpackung. Jetzt wisst ihr auch wie die Würstchen sich fühlen ;-).

Wie groß der Druck ist, spürt ihr, wenn ihr versucht euch aus der Faust zu befreien. Dabei müsst ihr die Folie fast zerreißen, damit das geht.
Das ist ein super einfaches aber sehr anschauliches Experiment zum Wasserdruck. Es ist auch lustig für einen Forscher-Geburtstag.
Um diese Phänomene geht es in diesem Experiment für Kita und Sachunterricht:
- Wasserdruck
- Verdunstungskälte
- Windchill-Effekt
5 Kommentare
25. April 2023 um 15:49 Uhr
27. April 2023 um 20:09 Uhr
16. Februar 2023 um 12:11 Uhr
20. November 2022 um 20:33 Uhr
20. November 2022 um 20:32 Uhr
Was denkst du?
Mehr beliebte beiträge, teebeutelrakete - experiment, wasser gefriert schlagartig - experiment, seife und wasser – keime verscheuchen, leuchtende wasserperlen - experiment für kinder, das träge frühstücksei - experiment für kinder, bleibe immer auf dem neuesten stand.

- Verschiedenes
Experimente mit Wasser
Rund sechzig Wasserexperimente für Kinder werden hier mittlerweile beschrieben: Wie kann Wasser sein? Wann schwimmt etwas? Warum kann etwas im Wasser verschwinden? Warum kann Wasser hochfließen? Warum macht Wasser Tropfen?
Für diese und viele weitere Fragen werden die Kinder beim Experimentieren die Antwort selbst herausfinden. Einige kindgerechte Erklärungen lassen keine Kinderfrage offen. Probiert es aus!

-> zurück
- Nach oben scrollen
Forschen & bloggen für Kinder
Ein Blog für Forscher & solche, die es werden möchten!

Wasserdruck: So ist das!

Nach unserem Familienausflug ins „ Wasser-Wunderland “ Schloss Linderhof, hatten wir einige Fragen zu Wasser im Allgemeinen & Wasserdruck im Speziellen. Also haben wir im Anschluss an unseren Ausflug daheim noch ein paar Experimente ausprobiert. Darunter ein lustiges Experiment zum Thema „Wasserdruck“.
Unter Wasserdruck versteht man den Schweredruck, der sich bei Wasser aufgrund der Gravitation einstellt. Diesen auf Gravitation beruhenden Druck, kennt man in allen Flüssigkeiten.
Wir brauchen: 1 Plastikfalsche (ca. 1,5l), Pinnwandnadeln, Wasser, große Schale zum Auffangen d. Wassers, Trichter, Gefäß zum Nachfüllen des Wassers
Was zu tun ist: Jeder Forscher kann ein Loch mit Hilfe der Pinnwand-nadeln in die verschlossene, Wasser-gefüllte Plastikflasche stechen. Bis zum Start des Experiments lassen wir die Nadeln in der Flasche stecken. Dann ziehen wir möglichst gleichzeitig die Nadeln aus der Flasche heraus & öffnen den Flaschenverschluss.
Was passiert ist: Aus den Löchern strömt Wasser heraus. Das Wasser spritzt in unterschiedlichen Bögen aus der Flasche heraus. Im oberen Bereich fällt der Wasserstrahl steiler ab, im unteren Bereich schießt das Wasser ziemlich weit aus der Flasche heraus.
Was wir herausgefunden haben: Wasser übt Druck aus, da die Wasserteilchen von der Erdanziehungskraft angezogen werden. Da Wasser übereinander gelagert ist, steigt der Druck auf die tiefen Wasserteilchen. Je tiefer man sich im Wasser befindet (= mit zunehmender Wassersäule), umso höher ist der Druck. Das sieht man in unserem Experiment daran, wie weit das Wasser seitlich aus der Flasche heraus spritzt. Löcher, die tiefer in die Flasche eingestochen wurden, lassen das Wasser weiter spritzen, da der Druck durch mehr Wasserteilchen, die Schweredruck ausüben können, höher ist.
Wenn wir uns an unseren Besuch auf Schloss Linderhof erinnern, fällt uns die Fontäne im großen Wasserbecken vor dem Schlossgebäude ein. Diese Fontäne kann bis zu 25m hoch in die Höhe spritzen & das allein durch die Kraft, die das Wasser durch das natürlich Gefälle erlangt. Auf seinem Weg zur großen Fontäne bewegt sich das Wasser aus dem nahe gelegenen Gebirge immer weiter in Richtung Tal, bis es über Rohrleitungen im Auffangbehältnis unterhalb des Wasserbeckens angelangt ist. Durch den Druck, den das Wasser aufgrund des Gefälles aufbaut, kann das Wasser für einige Zeit hoch in die Höhe gedrückt werden.
Nicht nur mich hat die Fontäne & der technologische Hintergrund sehr beeindruckt.
Dir wünsche ich jetzt viel Spaß beim nachmachen.
Deine Andrea
Ein Gedanke zu „Wasserdruck: So ist das!“
- Pingback: Experiment des Tages (25.06.2020): Wasserdruck – Astrid-Lindgren Gemeinschaftsgrundschule
Kommentar verfassen Antwort abbrechen
Der kleine Forscher
Experiment 5: was ist wasserdruck, was brauche ich.
- Eine leere Weichspülerflasche,
- eine Gießkanne mit Wasser und
- einen Erwachsenen, der Dir 3 Löcher in die Flasche bohrt und den Verschluss mit einem scharfen Messer abschneidet.
Wo kann ich das machen?
Am besten machst Du den Versuch draußen, es könnte nass werden.
Wie lange dauert es?
Weniger als 5 Minuten.
Wie geht es?
Lasse Dir von einem Erwachsenen 3 Löcher auf verschiedenen Höhen in die Seite der Flasche bohren (ca. 3mm im Durchmesser). Die Löcher sollten gleichmäßig über die Höhe der Flasche verteilt sein. Das oberste sollte jedoch mindestens 5cm vom Verschluss und das unterste mindestens 4-5cm vom Boden der Flasche entfernt sein. Dann sollte der Erwachsene mit einem scharfen Messer den Hals der Flasche so abschneiden, dass eine Öffnung entsteht, die groß genug ist, um bequem mit der Gießkanne Wasser hinein zu gießen.
Nun stelle die Flasche auf ebenen Boden (am besten draußen, jetzt wird es nass), so dass von den Löchern an der Seite aus ca. 1m Platz ist. Sehr gut wäre es, wenn die Flasche etwas erhöht steht (ca. 50 cm).
Gieße nun die Flasche mit der Gießkanne zügig in einem Rutsch ganz mit Wasser voll.
Was passiert?
Aus allen 3 Löchern schießt ein kleiner Wasserstrahl. Der oberste legt die kürzeste Strecke zurück, bevor er auf den Boden trifft. Dann kommt der Strahl aus dem mittleren Loch und der unterste Strahl geht am weitesten.
Warum ist das so?
Auf jedes Loch drückt eine andere Menge Wasser mit ihrem eigenen Gewicht. Auf der Zeichnung siehst Du die drei Löcher farblich dargestellt: das obere in rot, das mittlere in gelb und das untere in grün. Die farblich dazu passenden Pfeile stellen dar, wie hoch das Wasser über dem jeweiligen Loch steht. Die Pfeile sind natürlich länger, je tiefer das Loch ist. Je mehr Wasser auf das Loch drückt, umso größer die Kraft, die auf den Wasserstrahl wirkt … das Wasser spritzt weiter. Diese Kraft nennt man Wasserdruck.
Related Posts
About author.
Ihr findet mich auch bei Google+ ,oder Twitter .

37 Water Science Experiments: Fun & Easy
We’ve curated a diverse selection of water related science experiments suitable for all ages, covering topics such as density, surface tension, water purification, and much more.
These hands-on, educational activities will not only deepen your understanding of water’s remarkable properties but also ignite a passion for scientific inquiry.
So, grab your lab coat and let’s dive into the fascinating world of water-based science experiments!
Water Science Experiments
1. walking water science experiment.
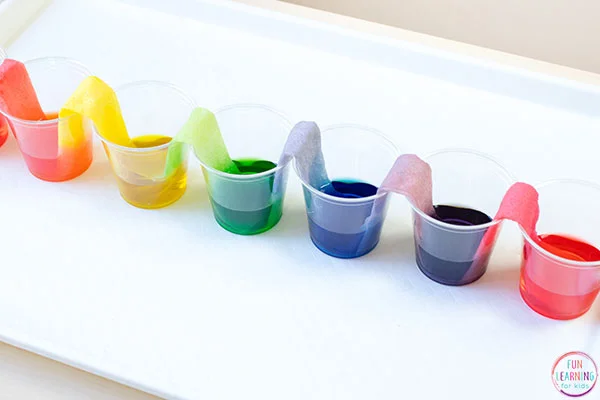
This experiment is a simple yet fascinating science experiment that involves observing the capillary action of water. Children can learn a lot from this experiment about the characteristics of water and the capillary action phenomenon. It is also a great approach to promote scientific curiosity and enthusiasm.
Learn more: Walking Water Science Experiment
2. Water Filtration Experiment
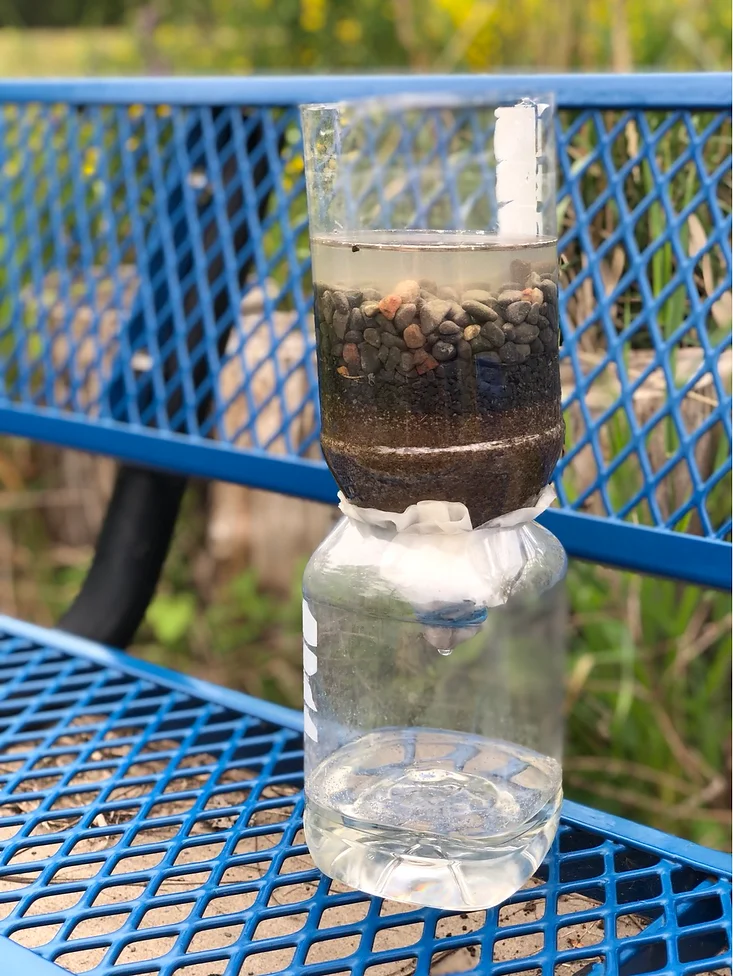
A water filtering experiment explains how to purify contaminated water using economical supplies. The experiment’s goal is to educate people about the procedure of water filtration, which is crucial in clearing water of impurities and contaminants so that it is safe to drink.
Learn more: Water Filtration Experiment
3. Water Cycle in a Bag
The water cycle in a bag experiment became to be an enjoyable and useful instructional exercise that helps students understand this idea. Participants in the experiment can observe the many water cycle processes by building a model of the water cycle within a Ziplock bag.
4. Cloud in a Jar
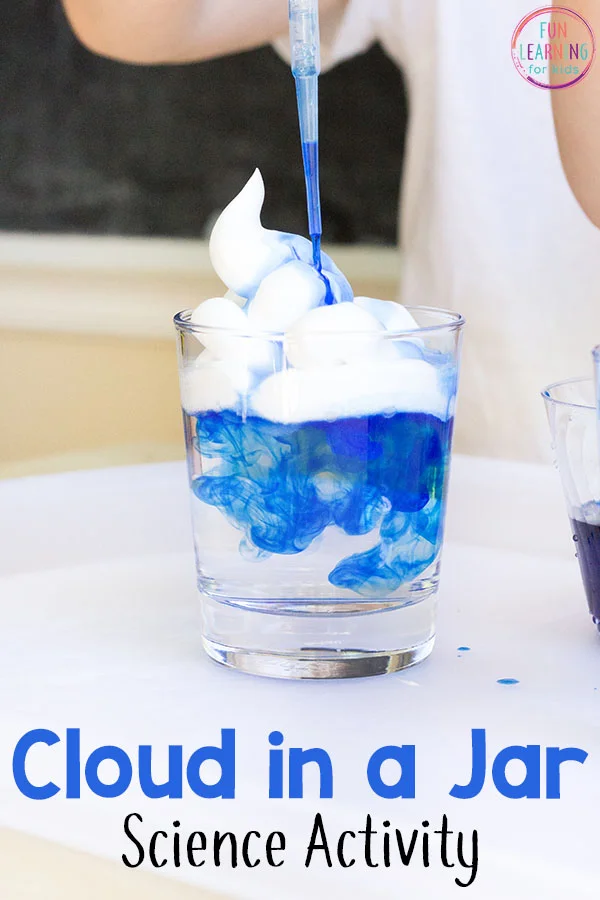
The rain cloud in a jar experiment is a popular instructional project that explains the water cycle and precipitation creation. This experiment is best done as a water experiment since it includes monitoring and understanding how water changes state from a gas (water vapor) to a liquid (rain) and back to a gas.
Learn more: Cloud in a Jar
5. The Rising Water
The rising water using a candle experiment is a wonderful way to teach both adults and children the fundamentals of physics while also giving them an exciting look at the properties of gases and how they interact with liquids.
6. Leak Proof Bag Science Experiment
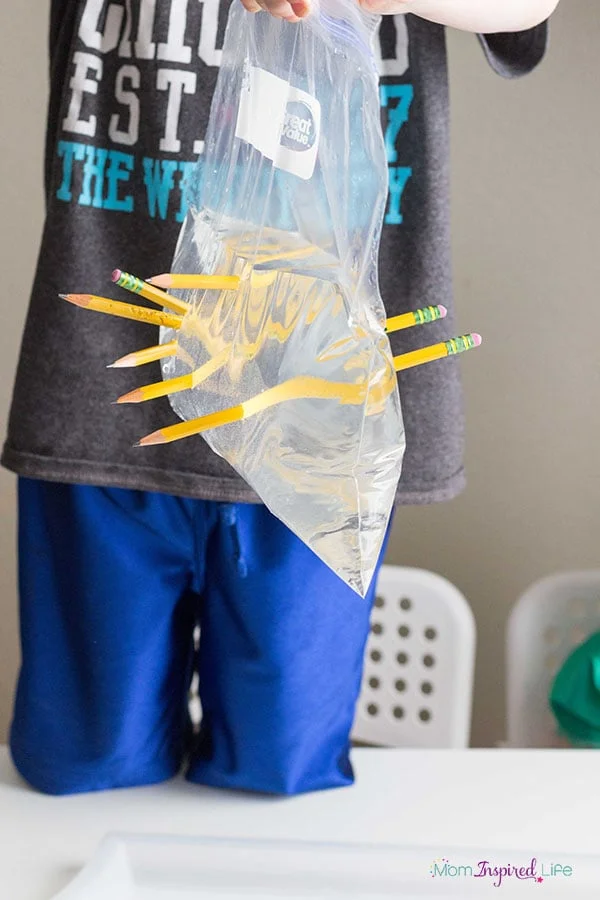
In the experiment, a plastic bag will be filled with water, and after that, pencils will be inserted through the bag without causing it to leak.
The experiments explain how the plastic bag’s polymer chains stretch and form a barrier that keeps water from dripping through the holes the pencils have produced.
Learn more: Leak Proof Bag Science Experiment
7. Keep Paper Dry Under Water Science Experiment
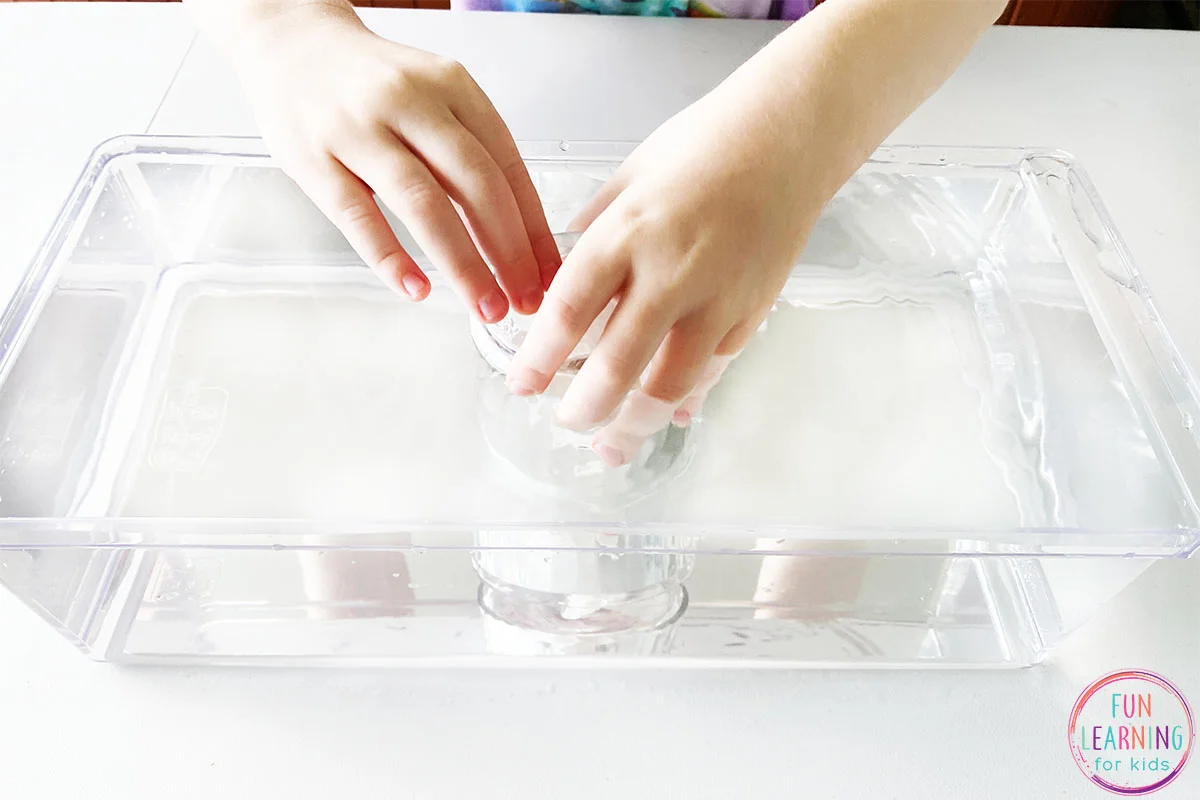
The experiment is an enjoyable way for demonstrating air pressure and surface tension for both adults and children. It’s an entertaining and engaging technique to increase scientific curiosity and learn about scientific fundamentals.
Learn more: Keep Paper Dry Under Water Science Experiment
8. Frozen Water Science Experiment
The Frozen Water Science Experiment is a fun and engaging project that teaches about the qualities of water and how it behaves when frozen.
You can gain a better knowledge of the science behind the freezing process and investigate how different variables can affect the outcome by carrying out this experiment.
9. Make Ice Stalagmites
10. Bending of Light
A fascinating scientific activity that explores visual principles and how light behaves in different surfaces is the “bending of light” water experiment. This experiment has applications in physics, engineering, and technology in addition to being a fun and interesting method to learn about the characteristics of light.
11. Salt on a Stick
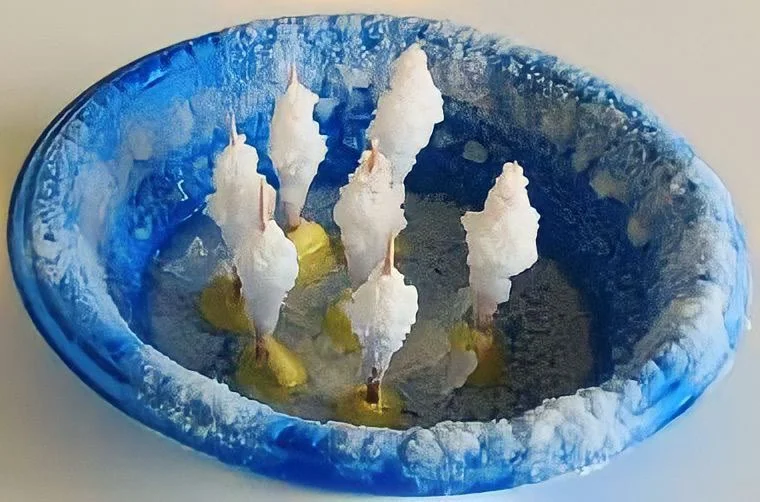
This experiment is an excellent way to catch interest, engage in practical learning, and gain a deeper understanding of the characteristics of water and how they relate to other substances. So the “Salt on Stick” water experiment is definitely worth trying if you’re looking for a fun and educational activity to try!
Learn More: Water Cycle Experiment Salt and Stick
12. Separating Mixture by Evaporation
This method has practical applications in fields like water processing and is employed in a wide range of scientific disciplines, from chemistry to environmental science.
You will better understand the principles determining the behavior of mixtures and the scientific procedures used to separate them by performing this experiment at home.
13. Dancing Spaghetti
Have you ever heard of the dancing spaghetti experiment? It’s a fascinating science experiment that combines simple materials to create a mesmerizing visual display.
The dancing spaghetti experiment is not only entertaining, but it also helps you understand the scientific concepts of chemical reactions, gas production, and acidity levels.

14. Magic Color Changing Potion
The magic color-changing potion experiment with water, vinegar, and baking soda must be tried since it’s an easy home-based scientific experiment that’s entertaining and educational.
This experiment is an excellent way to teach kids about chemical reactions and the characteristics of acids and bases while providing them an interesting and satisfying activity.
15. Traveling Water Experiment
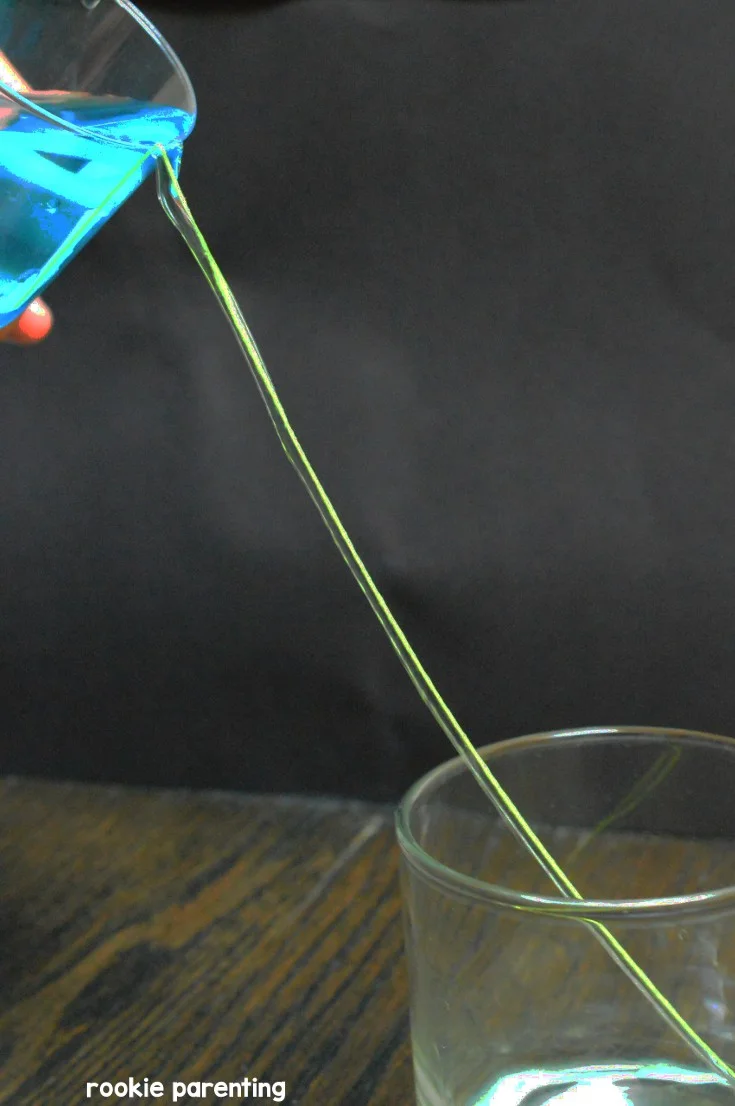
In this experiment, you will use simple objects like straws or strings to make a path for water to pass between two or more containers.
Learn more: Rookie Parenting
16. Dry Erase and Water “Floating Ink” Experiment
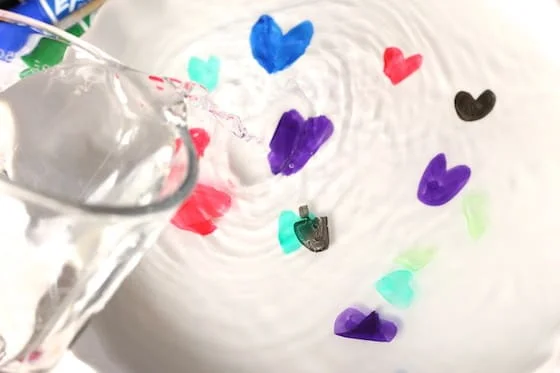
The dry-erase and water “floating ink” experiment offers an interesting look at the characteristics of liquids and the laws of buoyancy while also being a great method to educate kids and adults to the fundamentals of science.
Learn more: Dry Erase and Water Floating Ink Experiment
17. Underwater Candle
In this experiment, we will investigate a connection between fire and water and learn about the remarkable factors of an underwater candle.
18. Static Electricity and Water
19. Tornado in a Glass
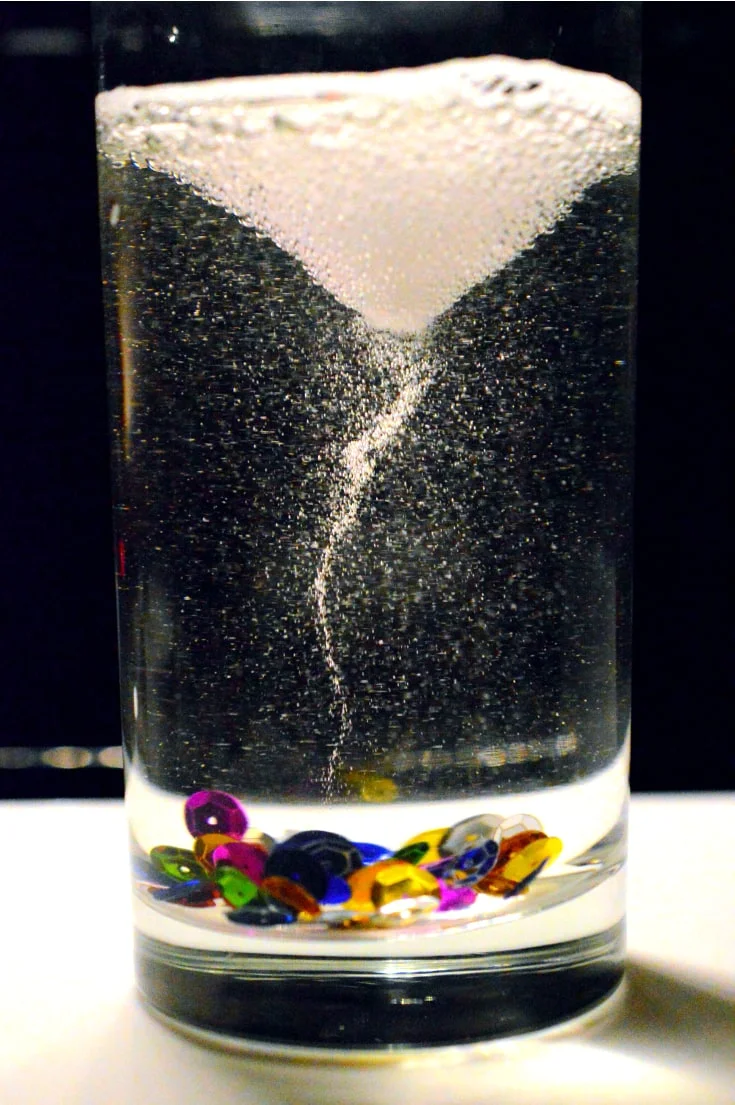
This captivating experiment will demonstrate how the forces of air and water can combine to create a miniature vortex, resembling a tornado.
Learn more: Tornado in a Glass
20. Make Underwater Magic Sand
Be ready to build a captivating underwater world with the magic sand experiment. This experiment will examine the fascinating characteristics of hydrophobic sand, sometimes referred to as magic sand.
21. Candy Science Experiment
Get ready to taste the rainbow and learn about the science behind it with the Skittles and water experiment! In this fun and colorful experiment, we will explore the concept of solubility and observe how it affects the diffusion of color.
Density Experiments
Density experiments are a useful and instructive approach to learn about the characteristics of matter and the fundamentals of science, and they can serve as a starting point for further exploration into the fascinating world of science.
Density experiments may be carried out with simple materials that can be found in most homes.
This experiment can be a great hands-on learning experience for kids and science lovers of all ages.
22. Super Cool Lava Lamp Experiment
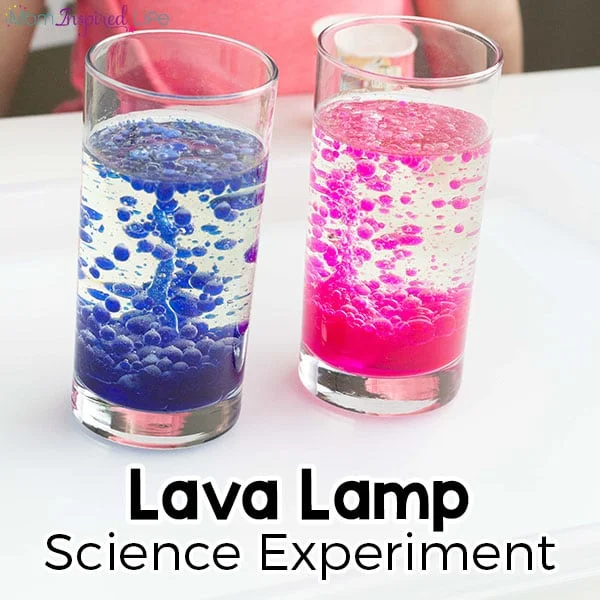
The awesome lava lamp experiment is an entertaining and educational activity that illustrates the concepts of density and chemical reactions. With the help of common household items, this experiment involves making a handmade lava lamp.
Learn more: Lava Lamp Science Experiment
23. Denser Than you Think
Welcome to the fascinating world of density science! The amount of matter in a particular space or volume is known as density, and it is a fundamental concept in science that can be seen everywhere around us.
Understanding density can help us figure out why some objects float while others sink in water, or why certain compounds do not mix.
24. Egg Salt and Water
Learn about the characteristics of water, including its density and buoyancy, and how the addition of salt affects these characteristics through performing this experiment.
25. Hot Water and Cold-Water Density
In this experiment, hot and cold water are put into a container to see how they react to one other’s temperatures and how they interact.
Sound and Water Experiments
Have you ever wondered how sound travels through different mediums? Take a look at these interesting sound and water experiments and learn how sounds and water can affect each other.
26. Home Made Water Xylophone
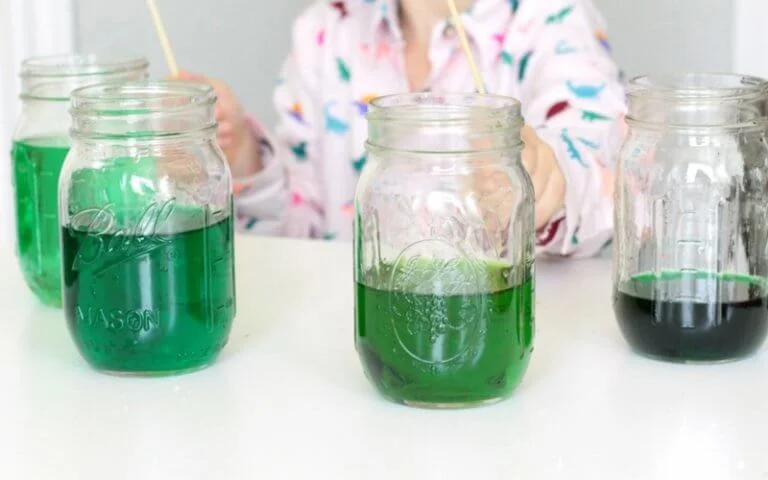
You can do this simple scientific experiment at home using a few inexpensive ingredients to create a handmade water xylophone.
The experiment demonstrates the science of sound and vibration and demonstrates how changing water concentrations can result in a range of tones and pitches.
Learn more: Home Made Water Xylophone
27. Create Water Forms Using Sound!
A remarkable experiment that exhibits the ability of sound waves to influence and impact the physical world around us is the creation of water formations using sound.
In this experiment, sound waves are used to generate patterns and shapes, resulting in amazing, intricate designs that are fascinating to observe.
28. Sound Makes Water Come Alive
These experiments consist of using sound waves to create water vibrations, which can result in a variety of dynamic and captivating phenomena.
29. Water Whistle
The water whistle experiment includes blowing air through a straw that is submerged in water to produce a whistle.
This experiment is an excellent way to learn about the characteristics of sound waves and how water can affect them.
Water Surface Tension Experiments
You can observe the effects of surface tension on the behavior of liquids by conducting a surface tension experiment.
By trying these experiments, you can gain a better understanding of the properties of liquids and their behavior and how surface tension affects their behavior.
30. Floating Paperclip
In this experiment, you will put a paper clip on the top of the water and observe it float because of the water’s surface tension.
31. Water Glass Surface Tension
Have you ever noticed how, on some surfaces, water drops may form perfect spheres? The surface tension, which is a characteristic of water and the cohesive force that holds a liquid’s molecules together at its surface, is to blame for this.
32. Camphor Powered Boat
The camphor-powered boat experiment is a fun and fascinating way to explore the principles of chemistry, physics, and fluid mechanics. In this experiment, a miniature boat is used to travel across the water’s surface using camphor tablets.
33. Pepper and Soap Experiment
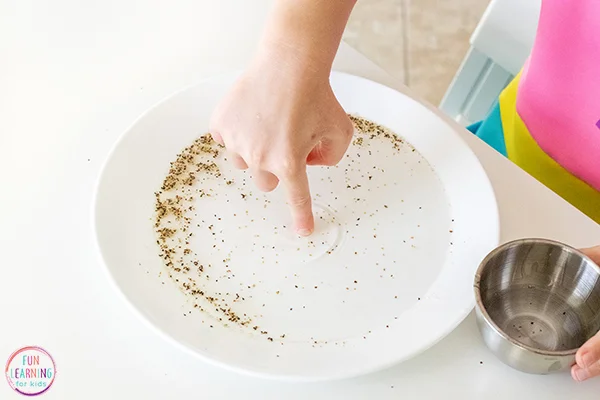
The pepper in a cloud experiment is a simple and interesting activity that explains the concept of surface tension. This experiment includes adding pepper to a bowl of water and then pouring soap to the mixture, causing the pepper to move away from the soap.
Learn more: Pepper and Soap Experiment
Boiling Water Experiments
Experiments with boiling water are an engaging and informative way to learn about physics, chemistry, and water’s characteristics.
These investigations, which include examining how water behaves when it changes temperature and pressure, can shed light on a variety of scientific phenomena.
It’s important to take the proper safety measures when performing experiments with hot water. Boiling water can produce steam and hot particles that are dangerous to inhale in and can result in severe burns if it comes into contact with skin.
34. Make It Rain
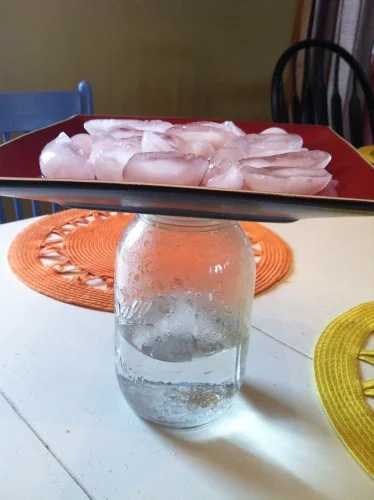
This experiment can be accomplished using basic supplies that can be found in most homes, make it an excellent opportunity for hands-on learning for both kids and science lovers.
Learn more: Make it Rain
35. Fire Water Balloons
Learning about the fundamentals of thermodynamics, the behavior of gases, and the effects of heat on objects are all made possible by this experiment.
36. Boil Water with Ice
The Boiling Water with Ice experiment is an engaging and beneficial approach to learn about temperature and the behavior of water. It can also serve as an introduction for further discovery into the wonderful world of science.
37. Boil Water in a Paper Cup
The “boil water in a cup” experiment is an easier but powerful approach to illustrate the idea of heat transmission by conduction. This experiment is often used in science classes to teach students about thermal conductivity and the physics of heat transfer.
Similar Posts:
- 68 Best Chemistry Experiments: Learn About Chemical Reactions
- Top 100 Fine Motor Skills Activities for Toddlers and Preschoolers
- Top 50 Fun Food Science Experiments
Leave a Comment Cancel reply
Save my name and email in this browser for the next time I comment.

IMAGES
VIDEO
COMMENTS
Das Experiment zeigt, dass der Wasserdruck bei zunehmender Wassertiefe ebenfalls zunimmt. Wasserstand ist gleich hoch. Hier geht es zu einem Experiment, welches erklärt, dass sich der Wasserstand bei verbundenen Gefäßen immer wieder ausgleicht. Die Kraft des Wasserdrucks?
Ganz anders fühlt sich das Wasser an, wenn ihr den Folienbeutel über der Hand habt. Denn jetzt spürt ihr den Druck, den das Wasser macht. Das Wasser hat ein eigenes Gewicht. 1 l Wasser wiegt 1 kg. Mit dem Gewicht drückt das Wasser auf eure Hand. In diesem Experiment drückt das Wasser auf die Folie und genau das könnt ihr spüren.
Wasserexperimente für Kinder - zu Aggregatzuständen, Schwimmen und Sinken, Wasserlöslichkeit, Wasserdruck und Anziehungskräften. Wasser: 60 Experimente - Nela forscht - Naturwissenschaft für Kinder
Hast du Lust, dich auf die Spuren des Wasserdrucks zu begeben?Dann ist dieses Experiment genau das Richtige für dich!Viel Spaß beim Nachmachen und bis zum nä...
Da Wasser übereinander gelagert ist, steigt der Druck auf die tiefen Wasserteilchen. Je tiefer man sich im Wasser befindet (= mit zunehmender Wassersäule), umso höher ist der Druck. Das sieht man in unserem Experiment daran, wie weit das Wasser seitlich aus der Flasche heraus spritzt.
Die farblich dazu passenden Pfeile stellen dar, wie hoch das Wasser über dem jeweiligen Loch steht. Die Pfeile sind natürlich länger, je tiefer das Loch ist. Je mehr Wasser auf das Loch drückt, umso größer die Kraft, die auf den Wasserstrahl wirkt … das Wasser spritzt weiter. Diese Kraft nennt man Wasserdruck.
Wasserdruck-Experiment. Je weiter unten im Meer man sich befindet, desto höher ist der Druck. In der Tiefsee haben sich die Tiere an diesen extremen Druck angepasst. Viele bestehen vorwiegend aus Wasser und haben kaum Hohlräume im Körper. Menschen hingegen würden dort zerdrückt. Mit diesem Experiment erfährst du, was Wasserdruck ist und ...
Woran es liegt: Das Experiment macht sehr anschaulich sichtbar, wie der Wasserdruck mit zunehmender Wassertiefe zunimmt. Der Grund: Je mehr Wasserteilchen übereinander sind, desto größer wird der Druck auf die unteren Wasserteilchen. Man sagt auch „der Druck steigt mit zunehmender Wassersäule". Oberflächenspannung sichtbar machen
Experiment der Woche: Wasserdruck 1. Du brauchst - einen Eimer - eine Plastiktüte - Wasser 2. Versuchsaufbau ... Zu dem Druck den das Wasser ausübt, sagen Experten hydrostatischer Druck. Je tiefer man taucht, desto höher wird der Druck. Deswegen müssen U-Boote sehr stabil gebaut sein, um dem Druck des Wassers ...
The rain cloud in a jar experiment is a popular instructional project that explains the water cycle and precipitation creation. This experiment is best done as a water experiment since it includes monitoring and understanding how water changes state from a gas (water vapor) to a liquid (rain) and back to a gas. Learn more: Cloud in a Jar. 5.